Set up price books for Adobe VIP
The price book setup is required to leverage the capability of volume discounting for Adobe products.
To set up price books for Adobe VIP (Value Incentive Plan),
-
Create a set of price books for Adobe VIP products.
⚠️ Warning:
To make changes to a pricebook, it is strongly recommended that you update it rather than delete it. Deleting a pricebook is discouraged, as it can lead to incorrect pricing behavior. If deletion is essential, ensure that all historical versions from the original pricebook are accurately recreated in the new one.- Go to Manage > Marketplace > Products > PRICE MANAGEMENT | Price Books.
- Click Create price book. Enter the name as ADOBE VIP 1 and the description as 1-9, and then click Create.
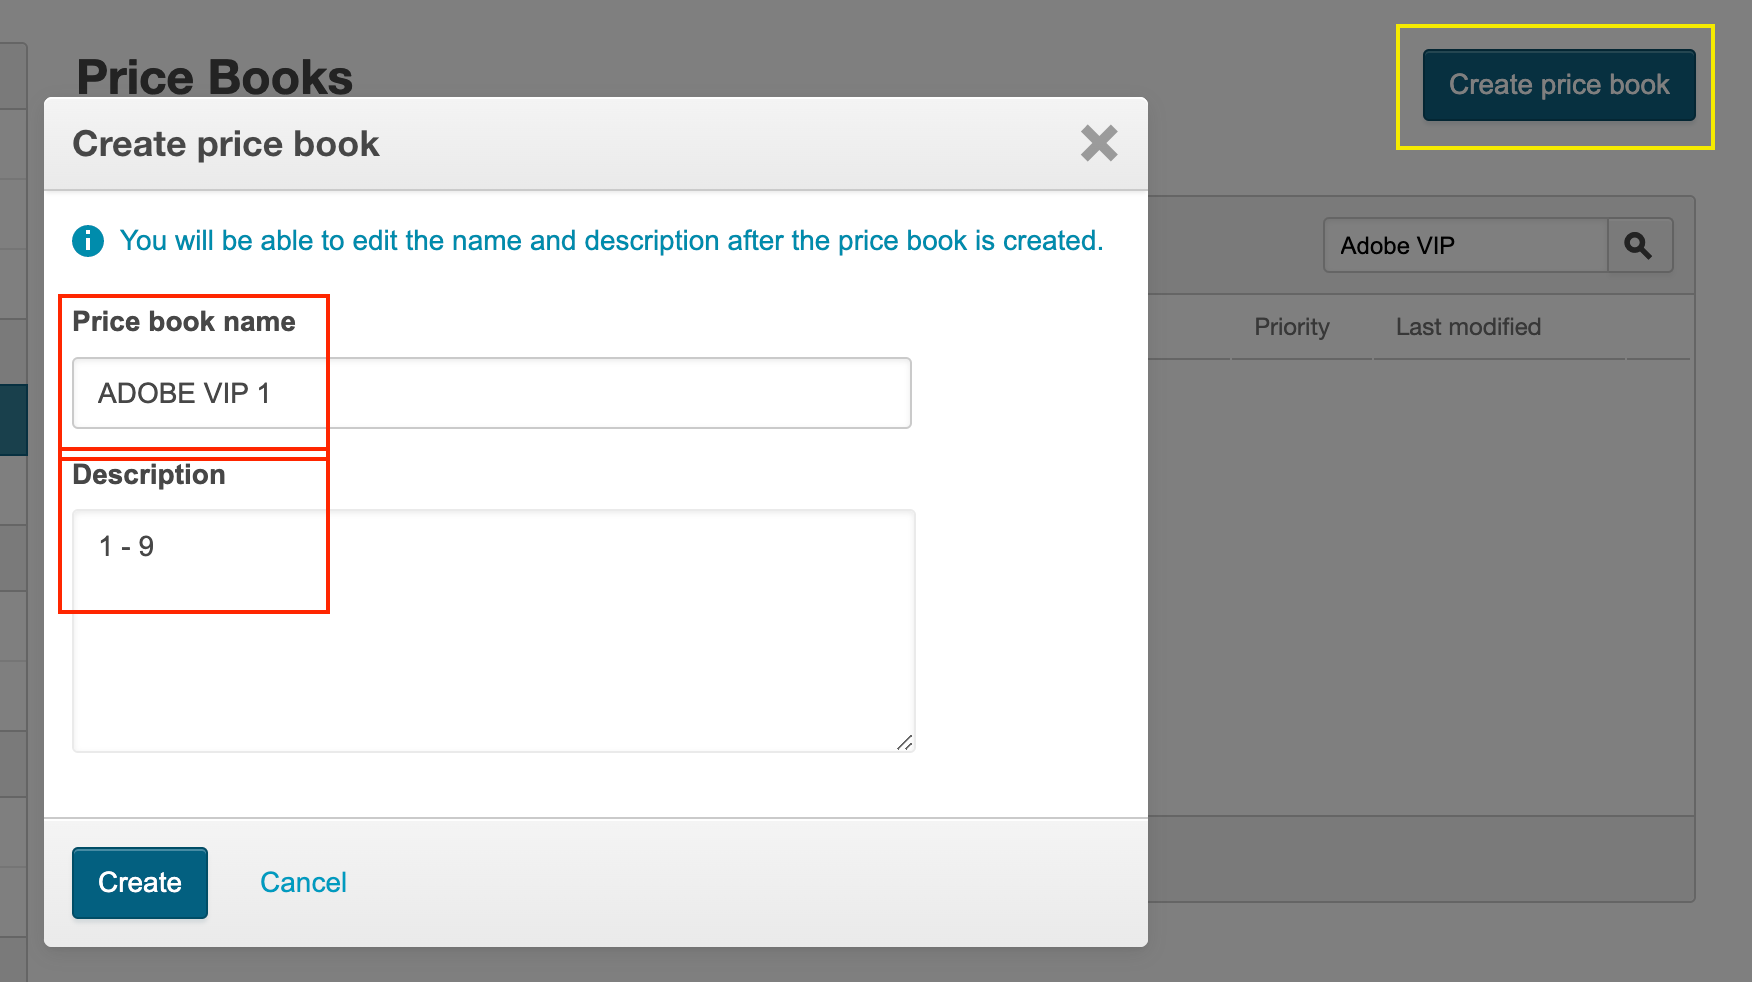
The name should be the one that you want to show on the storefront while showing prices for different levels and the description should be the range of licenses denoting the Adobe VIP levels.
New price books are assigned the default DRAFT status and the lowest priority.
- Repeat the above steps three more times to get a total of four price books with the below names and descriptions:
Note: The step describes how to perform the configuration for license-based products. There will be similar levels for transaction-based products and 3-year commit (3YC), contact your AppDirect technical representative for assistance.
Name Description ADOBE VIP 1 1-9 ADOBE VIP 2 10-49 ADOBE VIP 3 50-99 ADOBE VIP 4 100+ 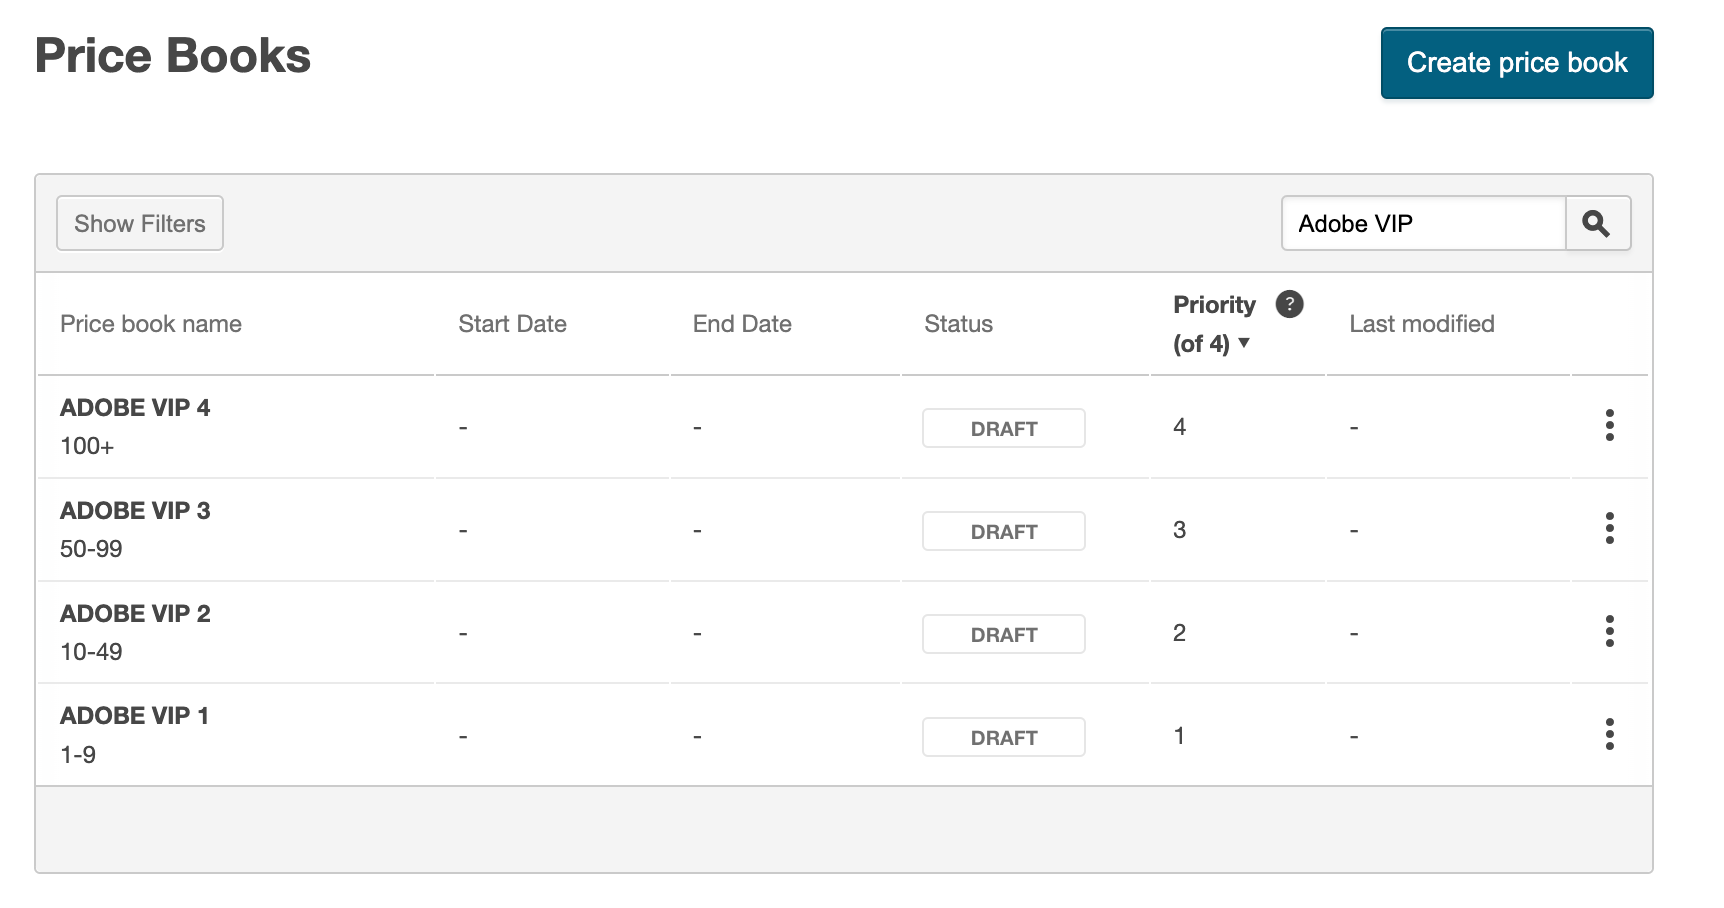
-
Set external sources for each price book depending on the level. For each price book:
- Click on the price book to open the detailed view page.
- Click Add External Sources at the bottom of the page.
- Select the license level for each price book and then click Save.
Price Book Name External Source Level ADOBE VIP 1 License Product - Level 1 ADOBE VIP 2 License Product - Level 2 ADOBE VIP 3 License Product - Level 3 ADOBE VIP 4 License Product - Level 4 
-
Add Adobe products to the price books and set the discounted price. For each price book:
- Click on the price book to open the detailed view page.
- Go to the Products section, and click Add Product if there are no products added to the price book yet, else click Products in Catalog and search for the Adobe product(s).

- Click Editions and select editions and fees for which the discounted price must be set. Click Add products to save the changes.
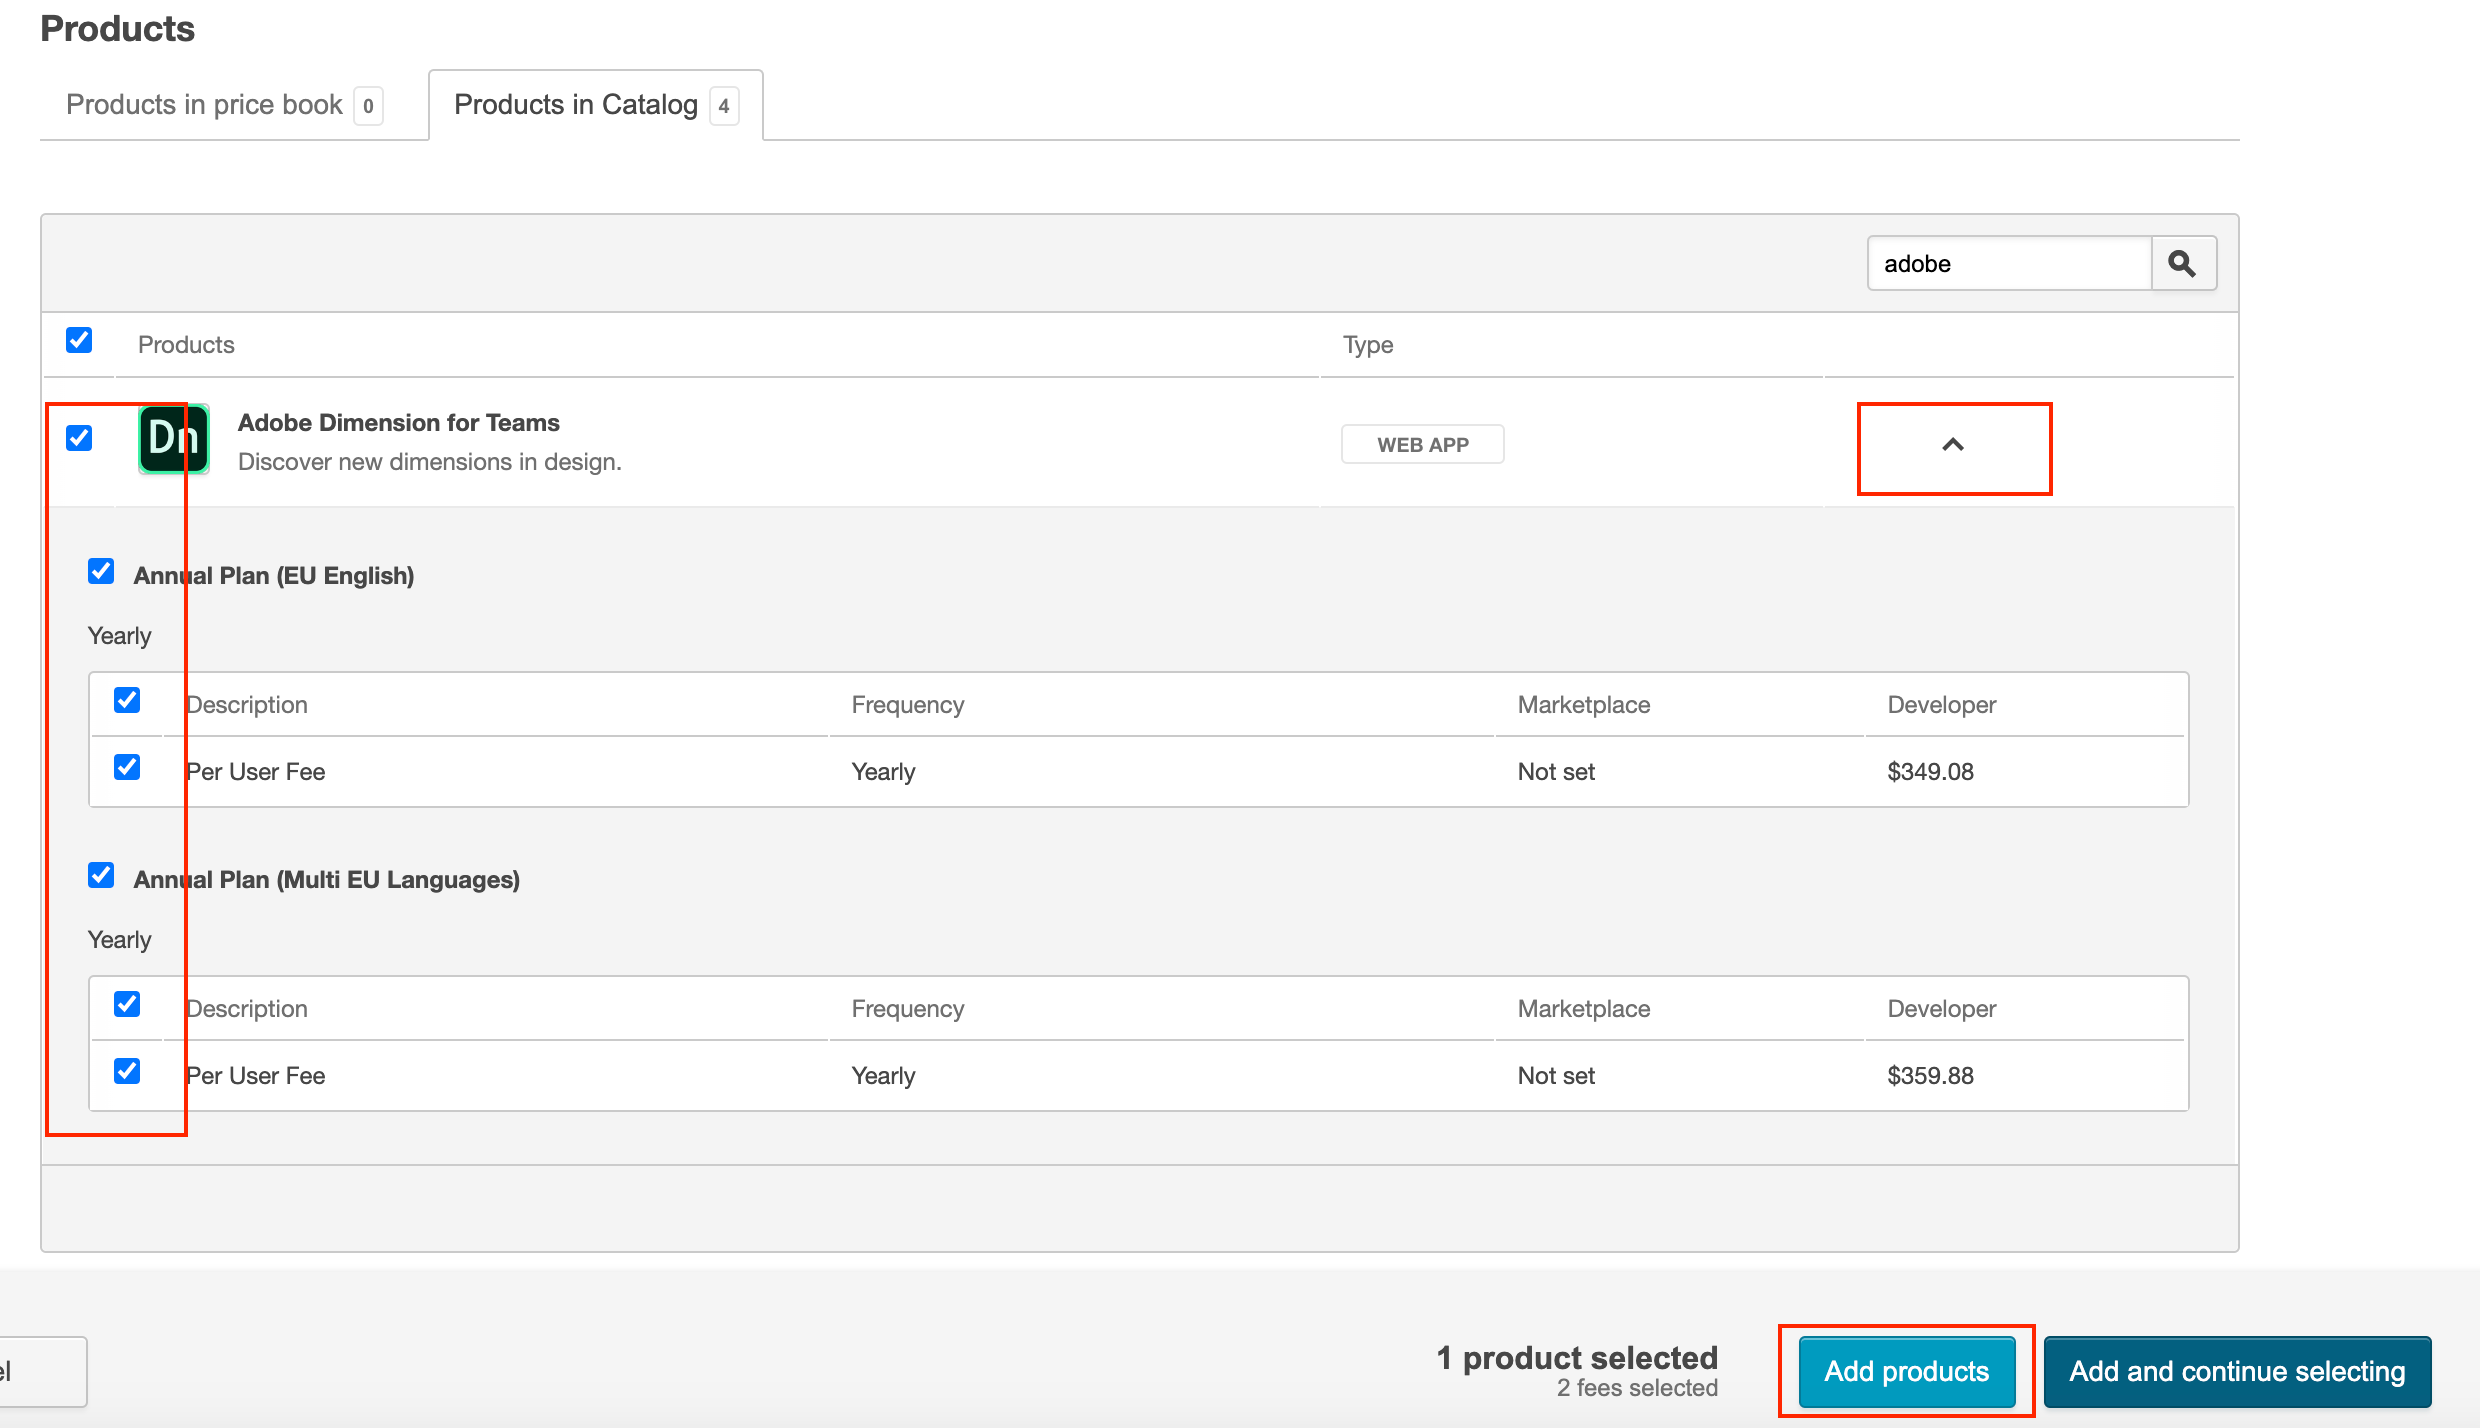
The product added to the price book will appear in the first tab Products in price book.
4. Click Editions again, select the fees, provide the discounted price (fixed price or markdown percentage) at the bottom, and then click Save.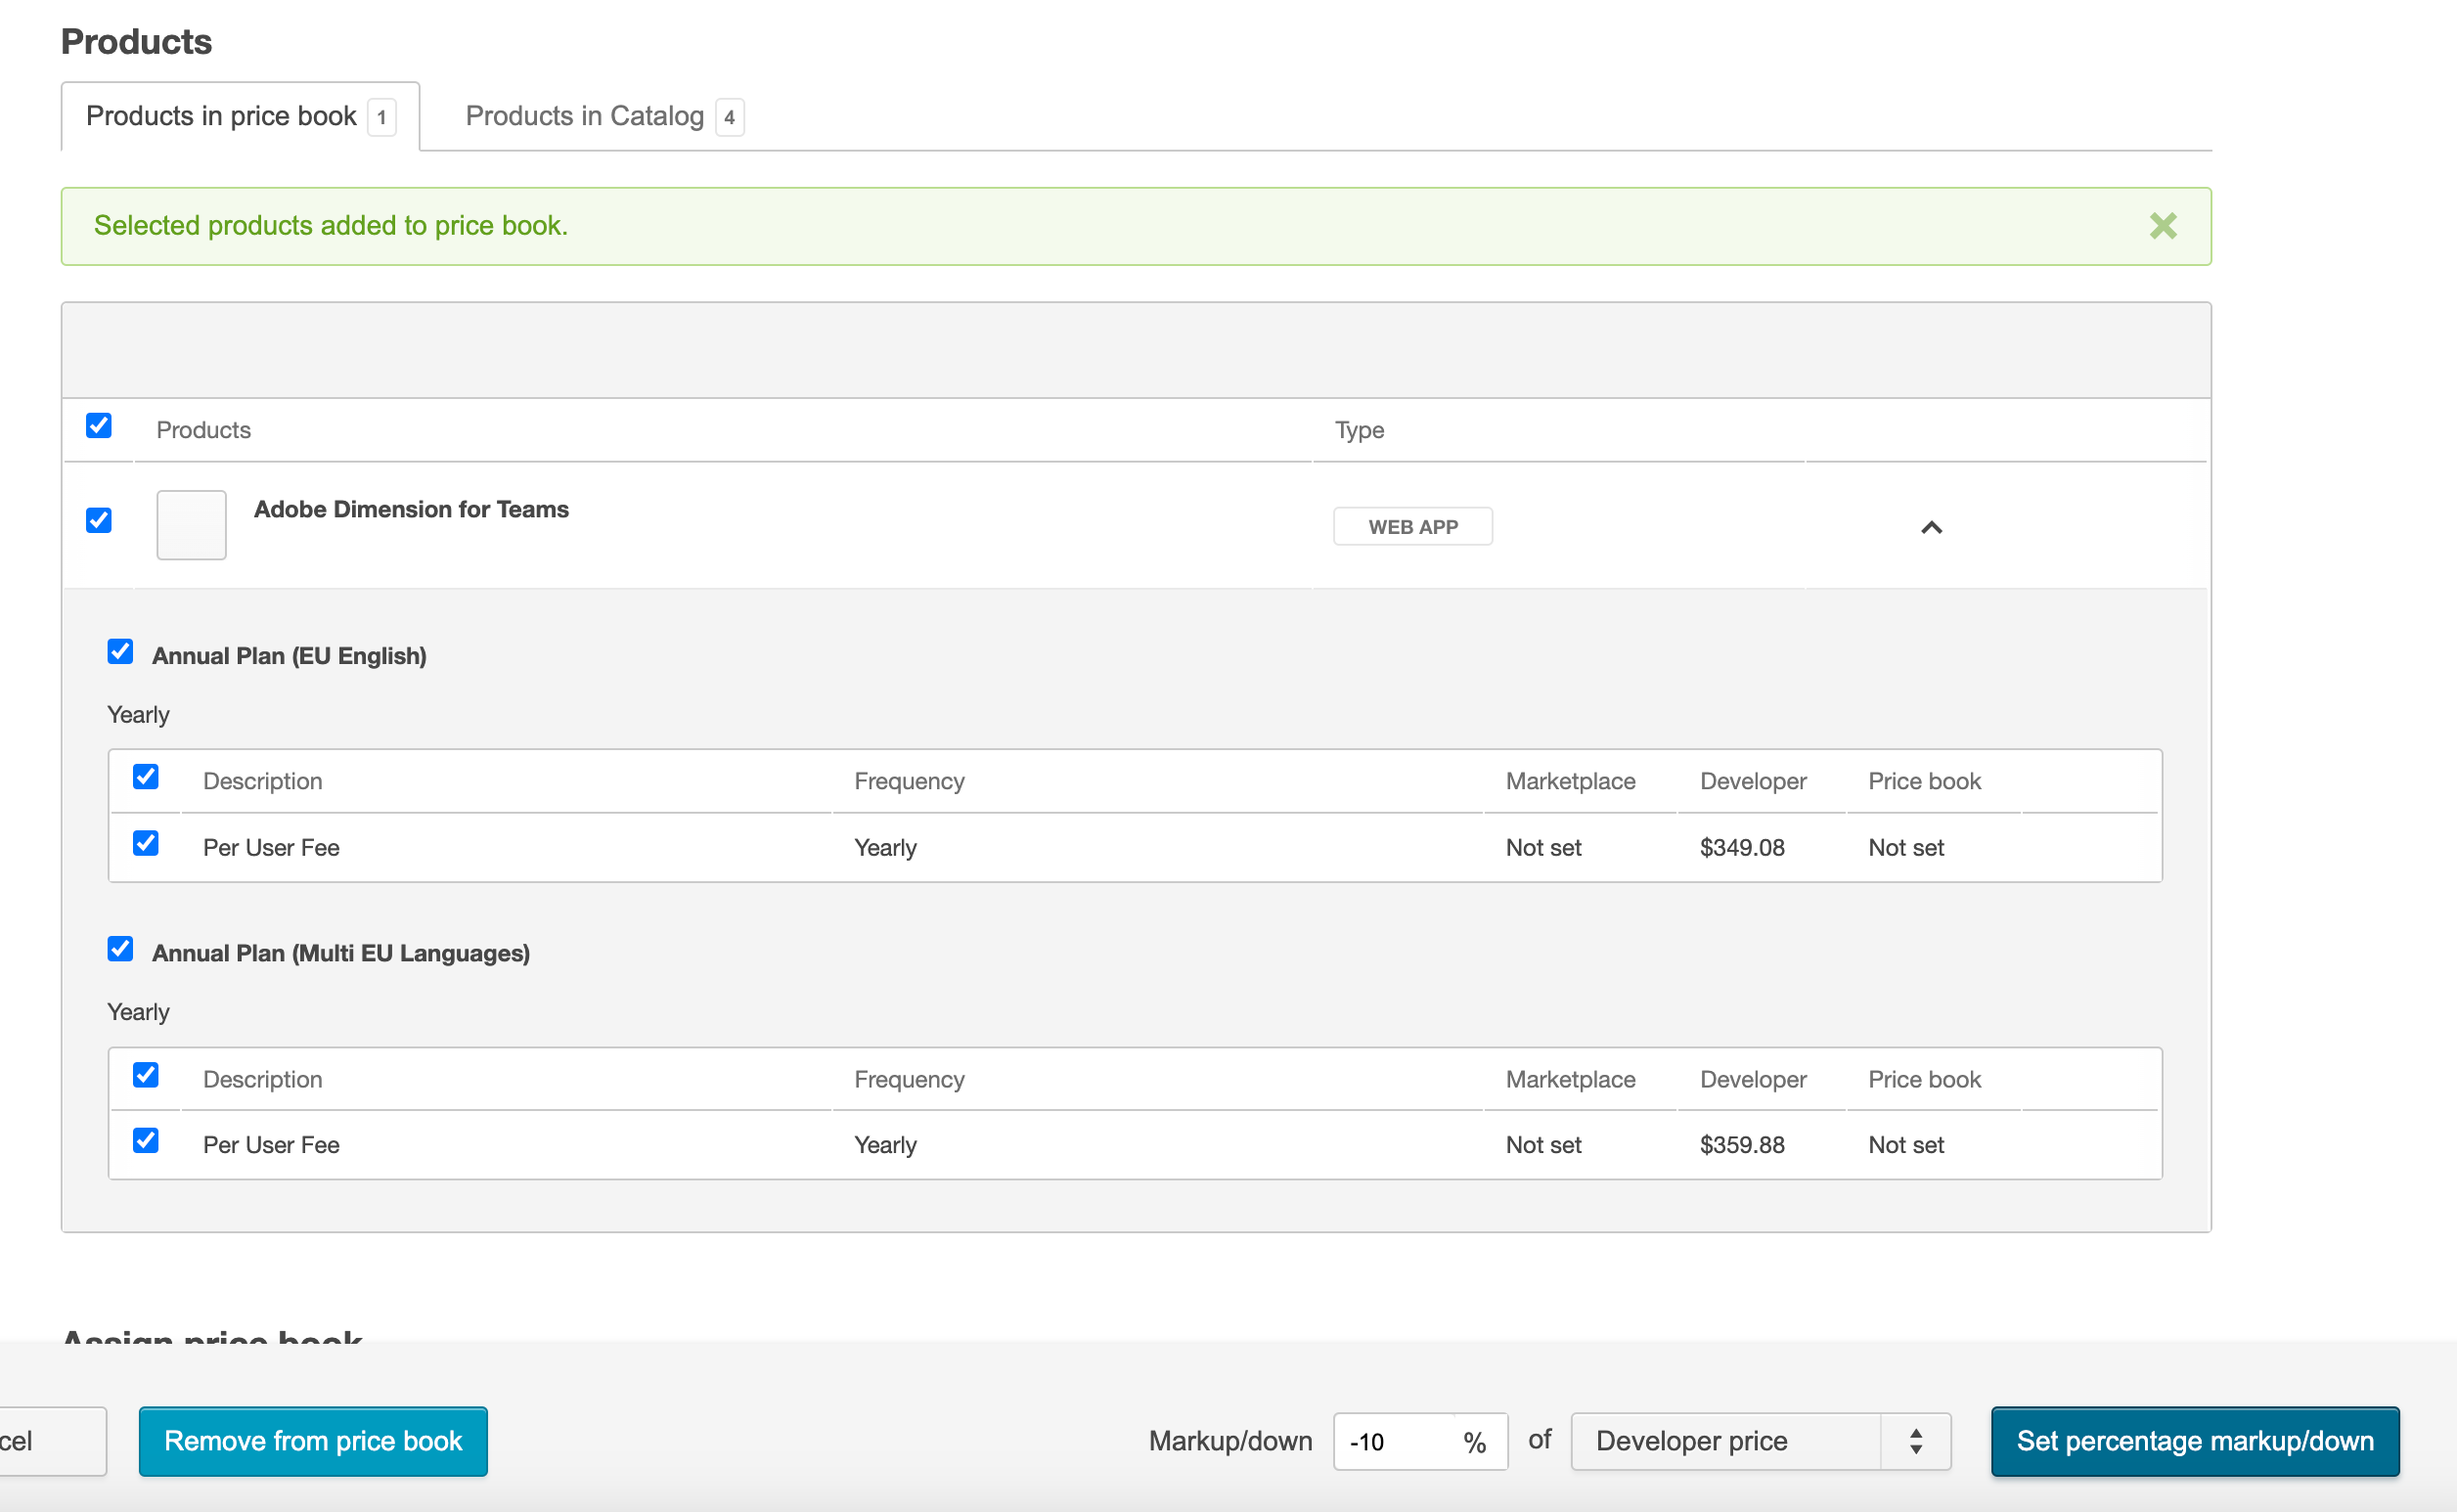
-
Set activation date for price books.
After the external source is set for the price book and products are added with custom prices, select the date from which you want to activate the price book. For each price book:- Click on the price book to open the detailed view page.
- Set the Start Date for the price book and click Activate.
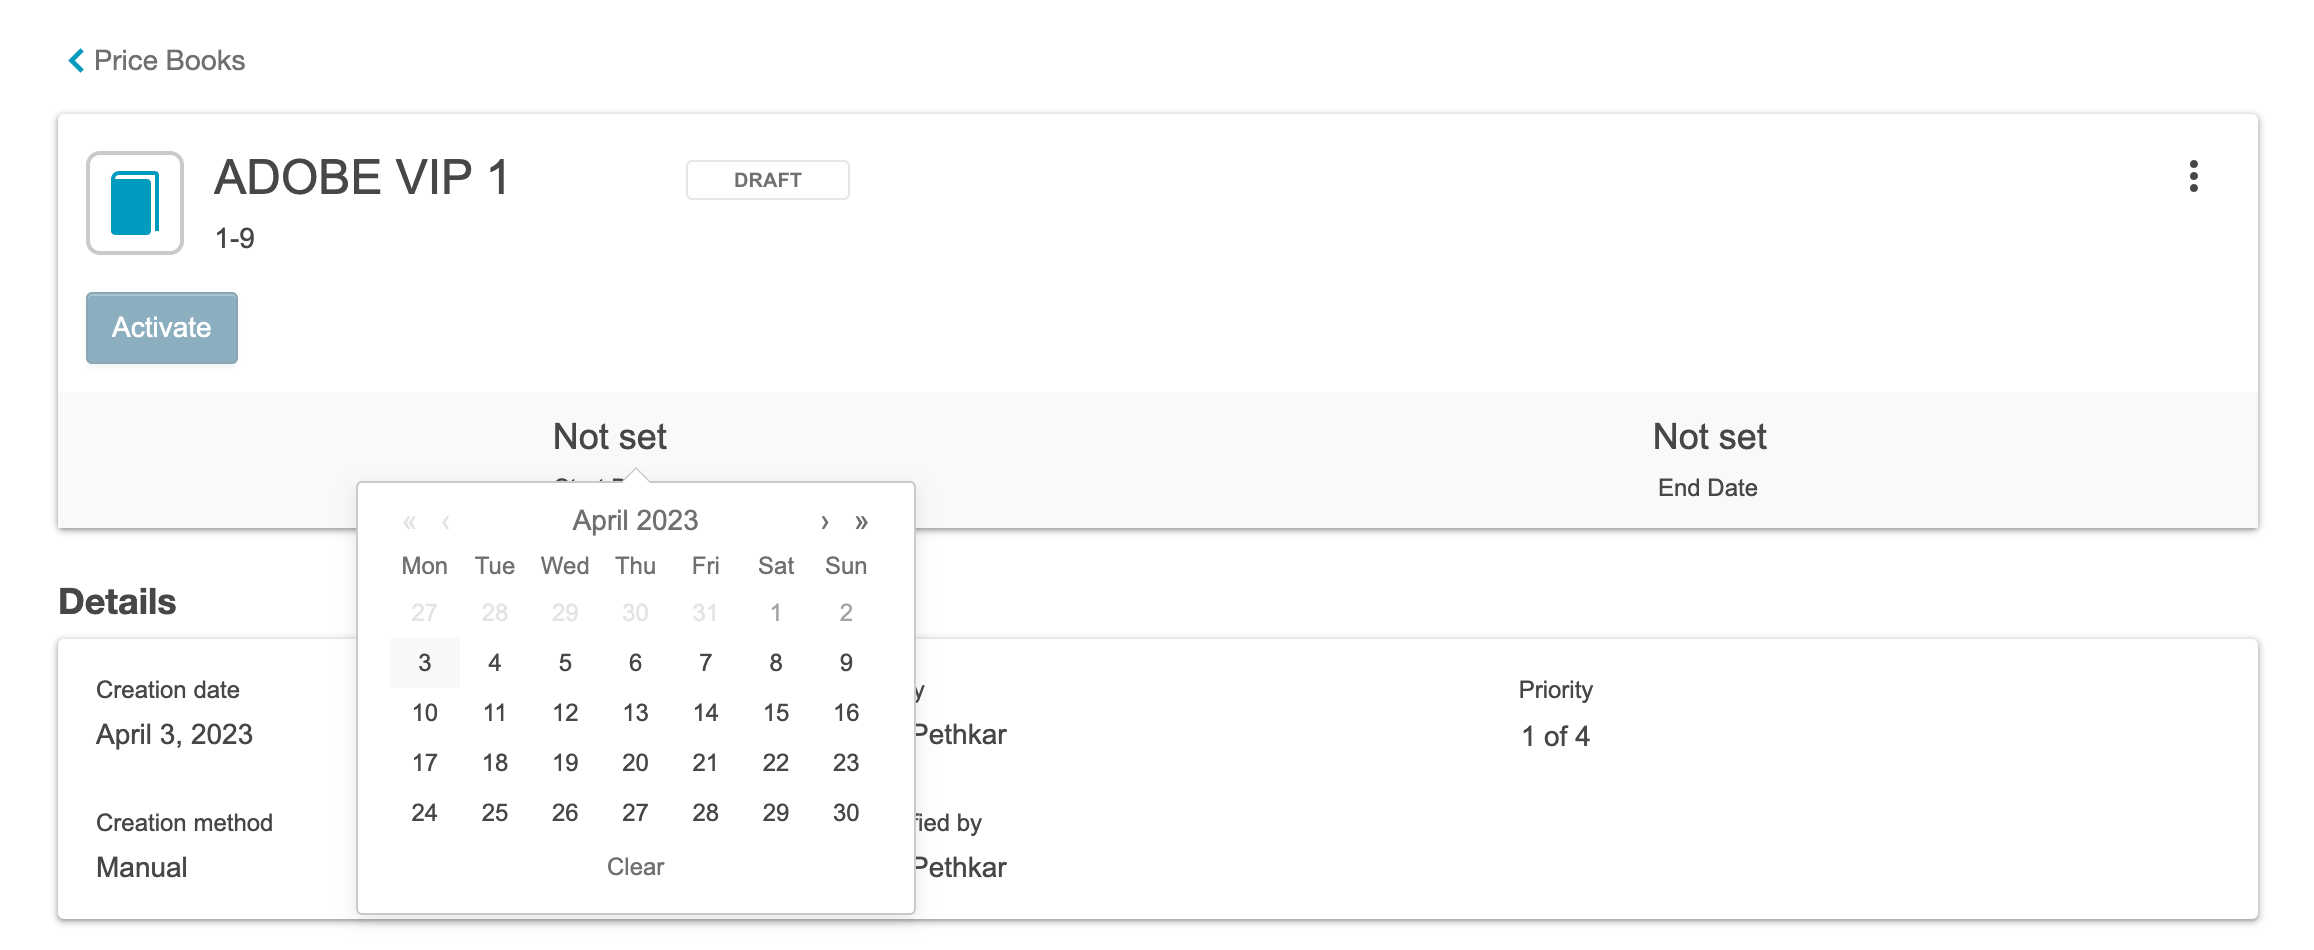
The activation successful message appears.
-
Verify if the set up has been correctly configured.
- The price books list page must display all the configured price book details.

-
The storefront displays the correct prices.
- Search for the product and click on the Edition & Pricings tab.
A banner will be displayed for the Adobe VIP Pricing information.
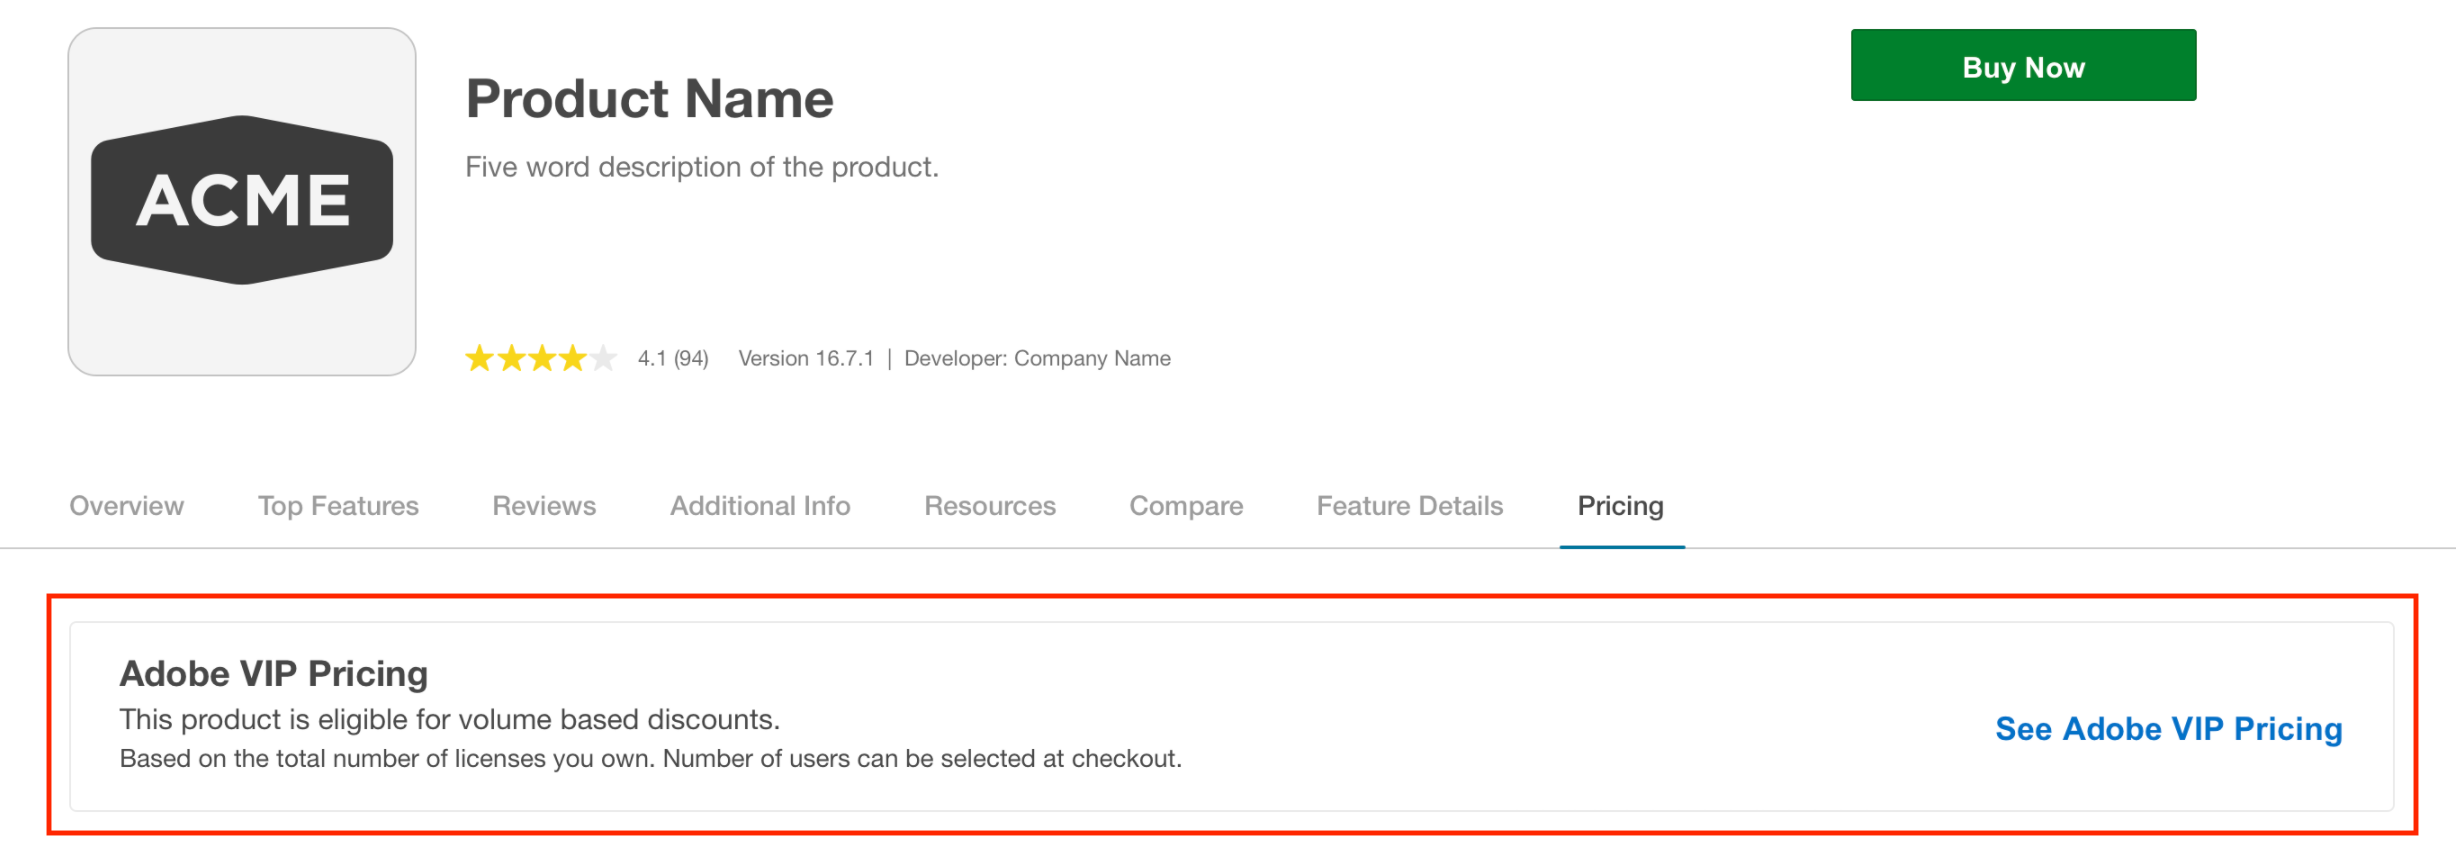
- Click See Adobe VIP Pricing to view the discounted prices for each level.
- Search for the product and click on the Edition & Pricings tab.
-
The checkout (v2) page displays the correct prices.
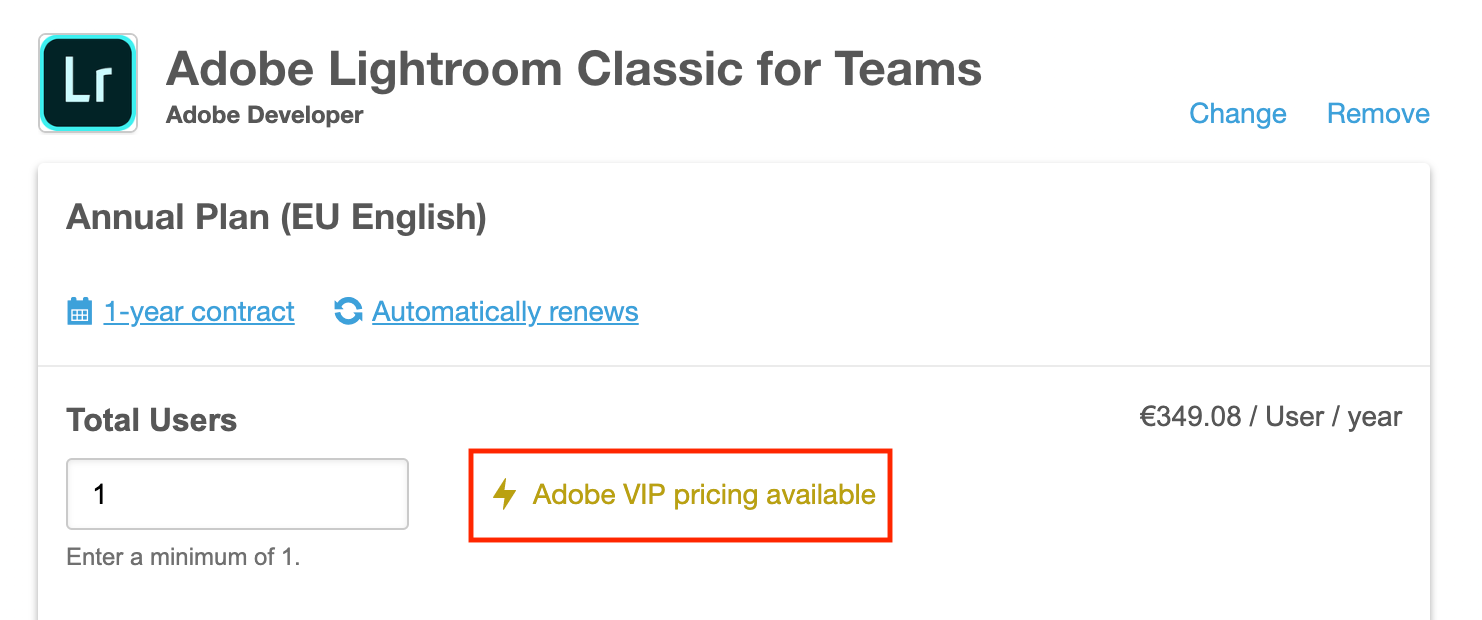
If the product is eligible for the Adobe VIP discount, Adobe VIP pricing available text will be shown next to the input box for the number of units.
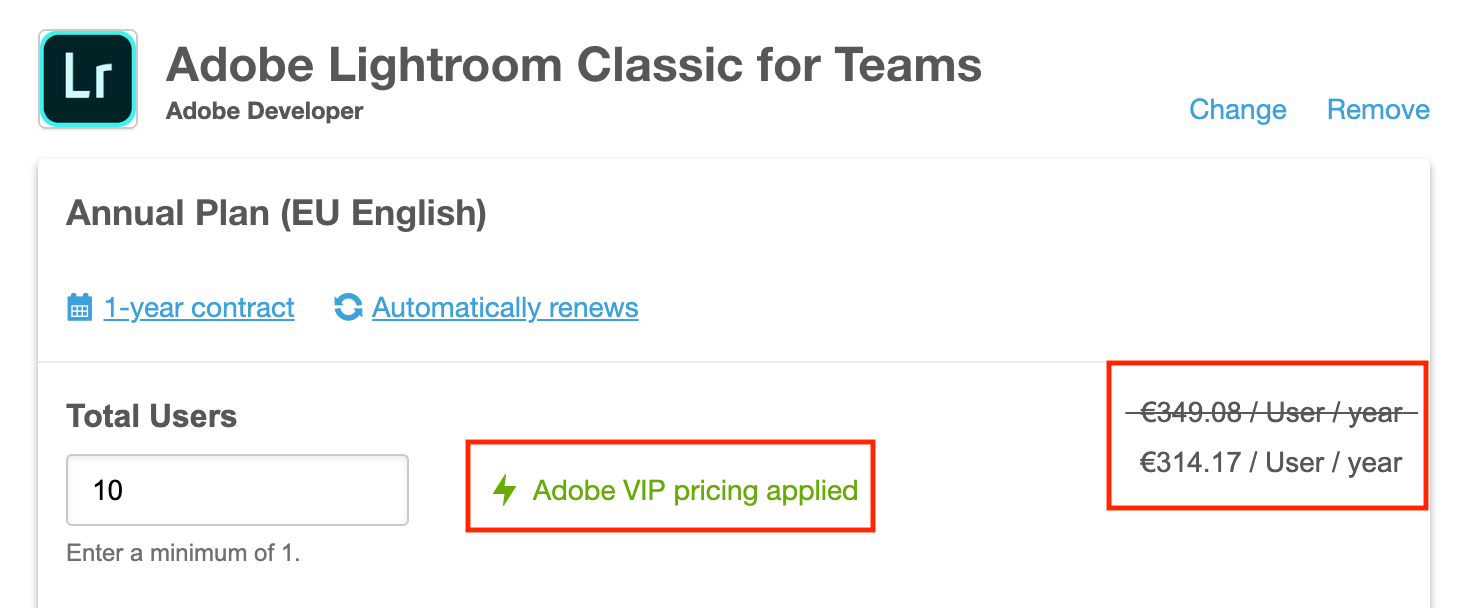
On applying the discount, Adobe VIP pricing applied text will be shown next to the input box for the number of units.
With price books set up, all the required configurations are complete. You can now sell Adobe products on your marketplace.
Was this page helpful?
Tell us more…
Help us improve our content. Responses are anonymous.
Thanks
We appreciate your feedback!