Configure a custom domain
❗ Important: Domain and Certificate Management is being rolled out to select customers and is not enabled for all marketplaces. This topic applies only when the feature is enabled for your marketplace. If Domain and Certificate Management does not appear under SETTINGS at Manage > Marketplace > Settings, contact your AppDirect technical representative to request it.
You can set up a custom domain for your marketplace from Domain and Certificate Management. The setup wizard walks you through entering your domain, adding a CNAME record, and activating the domain.
Your custom domain must be a subdomain. For example, use marketplace.example.com. You cannot use a root or apex domain such as example.com.
After you activate a custom domain, you cannot change it or revert to the default AppDirect URL usig this UI. Contact AppDirect Support for changes after activation. Note that AppDirect does not add redirects from your old URL to the new URL.
Before you start
Your marketplace must have Domain and Certificate Management enabled. See Domain and Certificate Management for how to open the dashboard.
Also, you will need access to your organization's DNS provider to add a CNAME record.
Start custom domain setup
📝 Note: This documentation page may refer to Manage > Marketplace in navigation steps. If the Manage option is not available in your navigation, click the grid icon on the top-left corner of your header and click Marketplace.
- Go to Manage > Marketplace > Settings.
- Under SETTINGS, click Domain and Certificate Management.
- On the Certificate Management dashboard, find the Custom Domain card in Actions.
- Click Configure Domain.
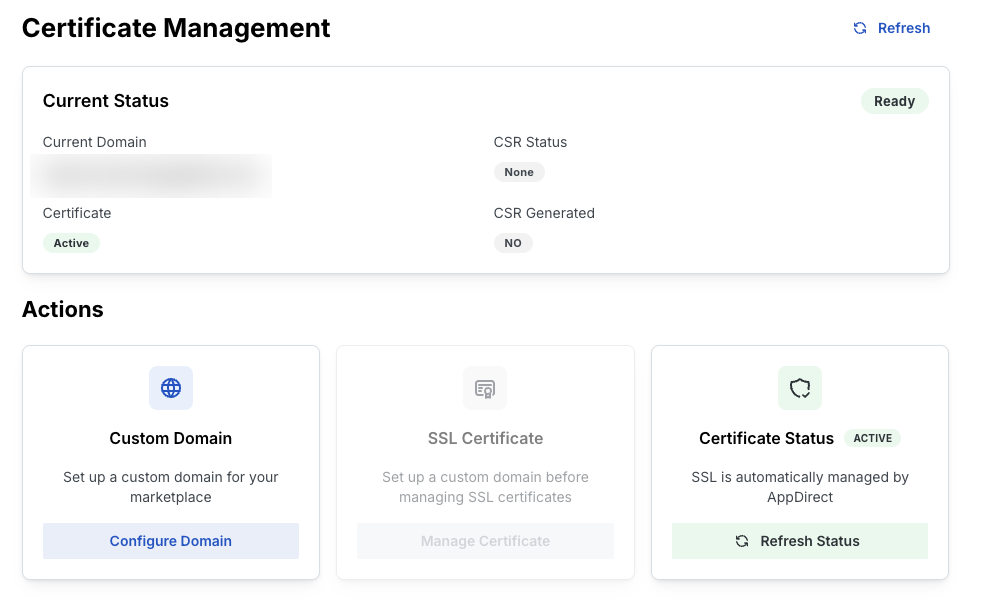
Until you activate a custom domain, Manage Certificate on the SSL Certificate card is unavailable.
The Configure a custom domain page opens.
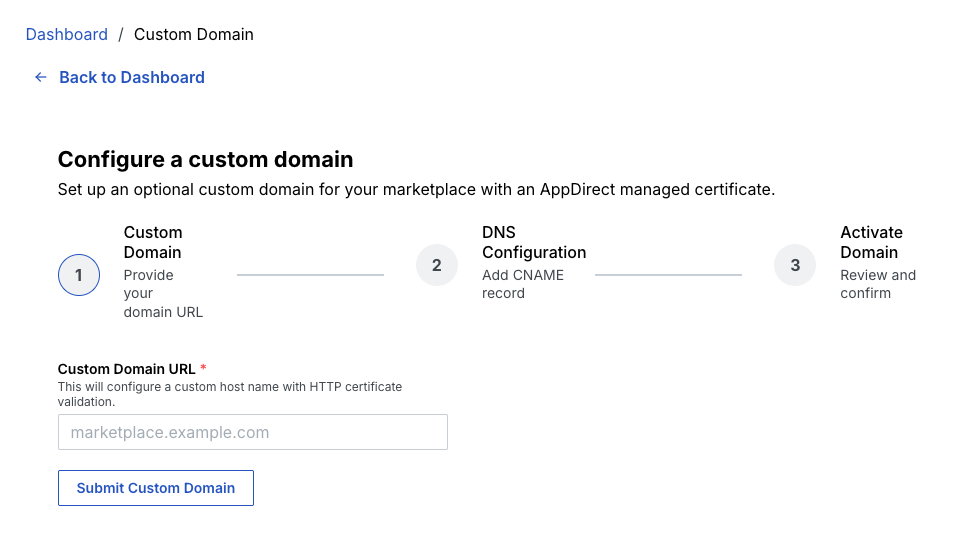
Step 1: Enter your custom domain URL
- On the Configure a custom domain page, enter your domain in Custom Domain URL. Use the format
subdomain.rootdomain.com. - Click Submit Custom Domain.
Step 2: Add and verify your CNAME record
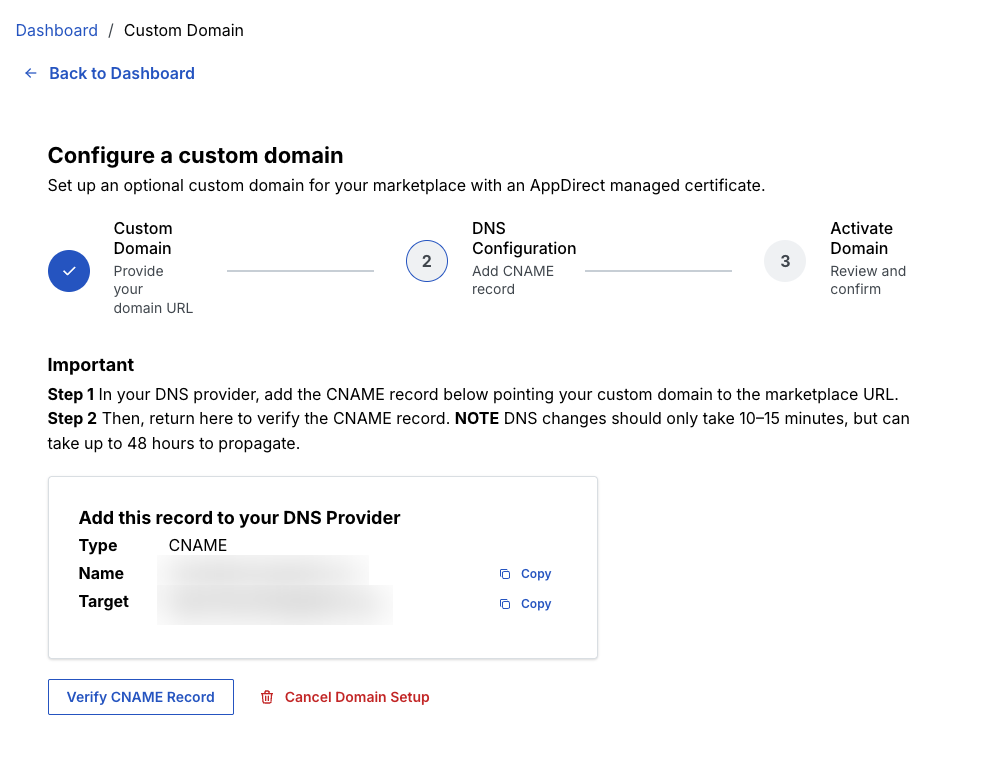
- On the DNS Configuration step, note the CNAME record shown in Add this record to your DNS Provider.
- Sign in to your DNS provider. Add a CNAME record using the Type, Name, and Target values from the page. Click Copy next to Name or Target to copy a value.
- Wait for DNS to propagate. Changes often take 10 to 15 minutes. They can take up to 48 hours.
- Return to the Configure a custom domain page. Click Verify CNAME Record.
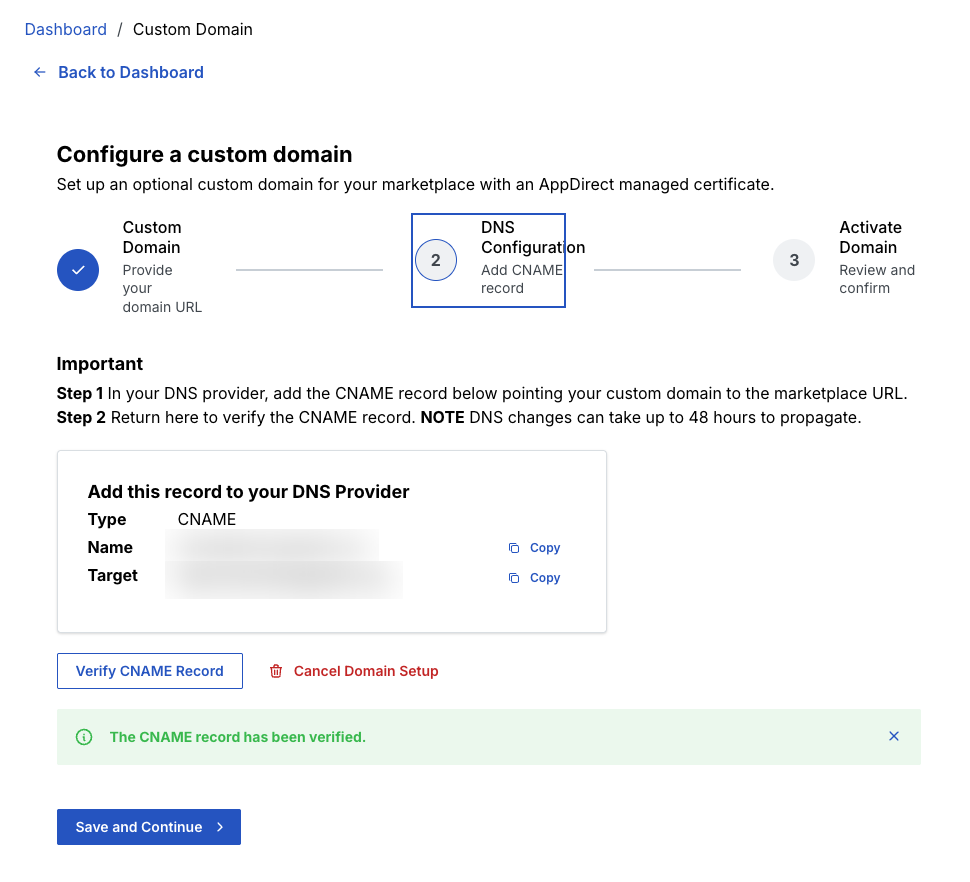
When verification succeeds, a message confirms that the CNAME record has been verified. Click Save and Continue.
Cancel domain setup
While your domain is still pending, you can click Cancel Domain Setup on the DNS Configuration step. This removes the in-progress domain setup before activation.
Step 3: Review and activate your domain
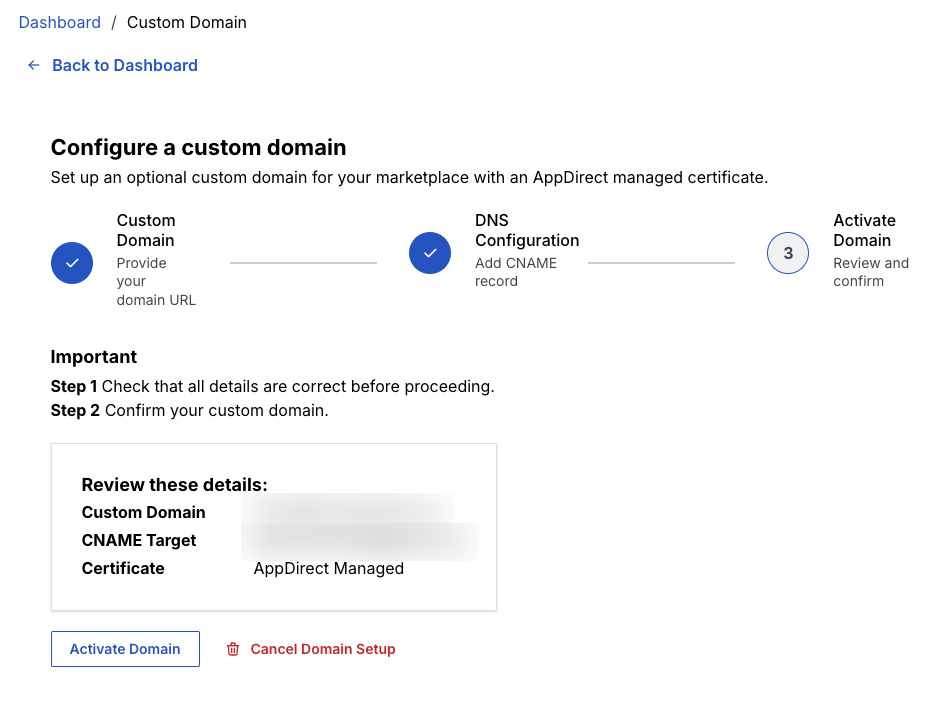
- On the Activate Domain step, review the following:
- Custom Domain
- CNAME Target
- Certificate
- Click Activate Domain.
- In the Activate your custom domain dialog, read the confirmation message. Activation is permanent. Click Activate Domain to confirm.
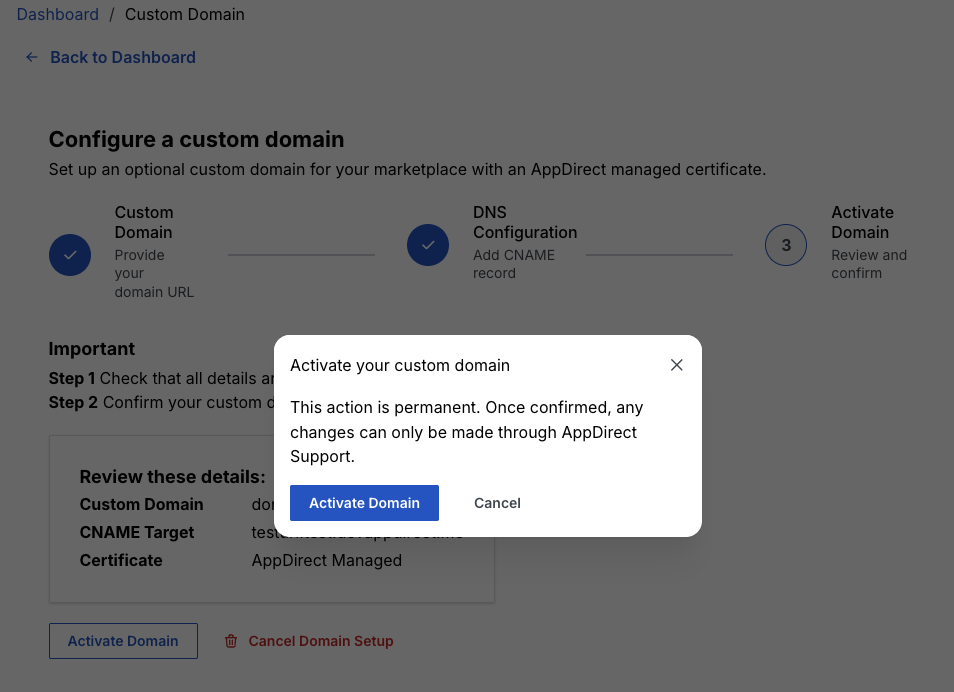
When activation completes, the page shows Custom Domain Activated. Your marketplace base URL is updated to your custom domain. Changes may take a few minutes to fully propagate.
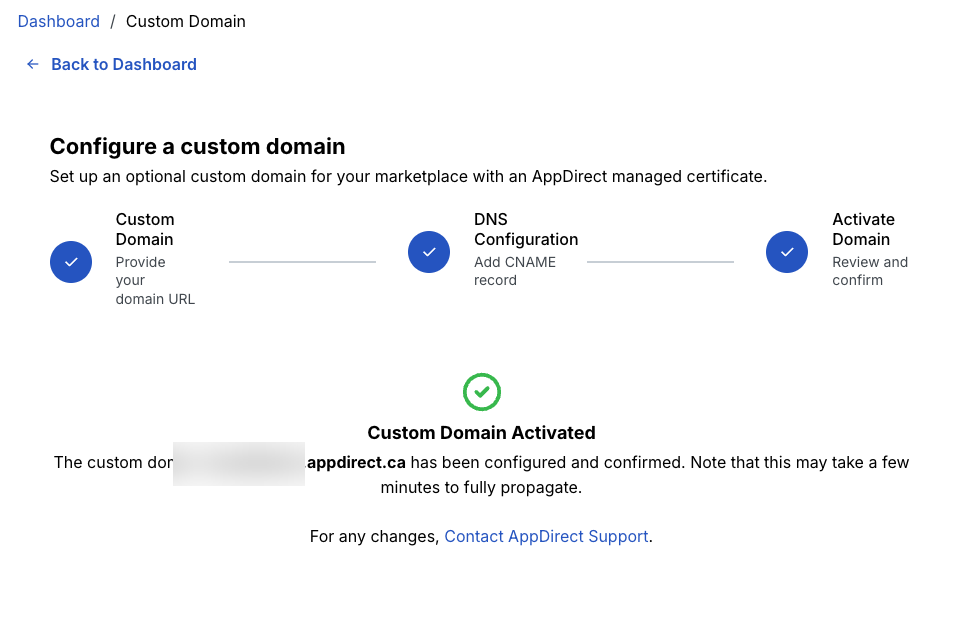
For any changes after activation, contact your AppDirect technical representative.
Troubleshooting CNAME verification
If verification fails, check that the CNAME Target in your DNS provider matches the Target shown on the page exactly.
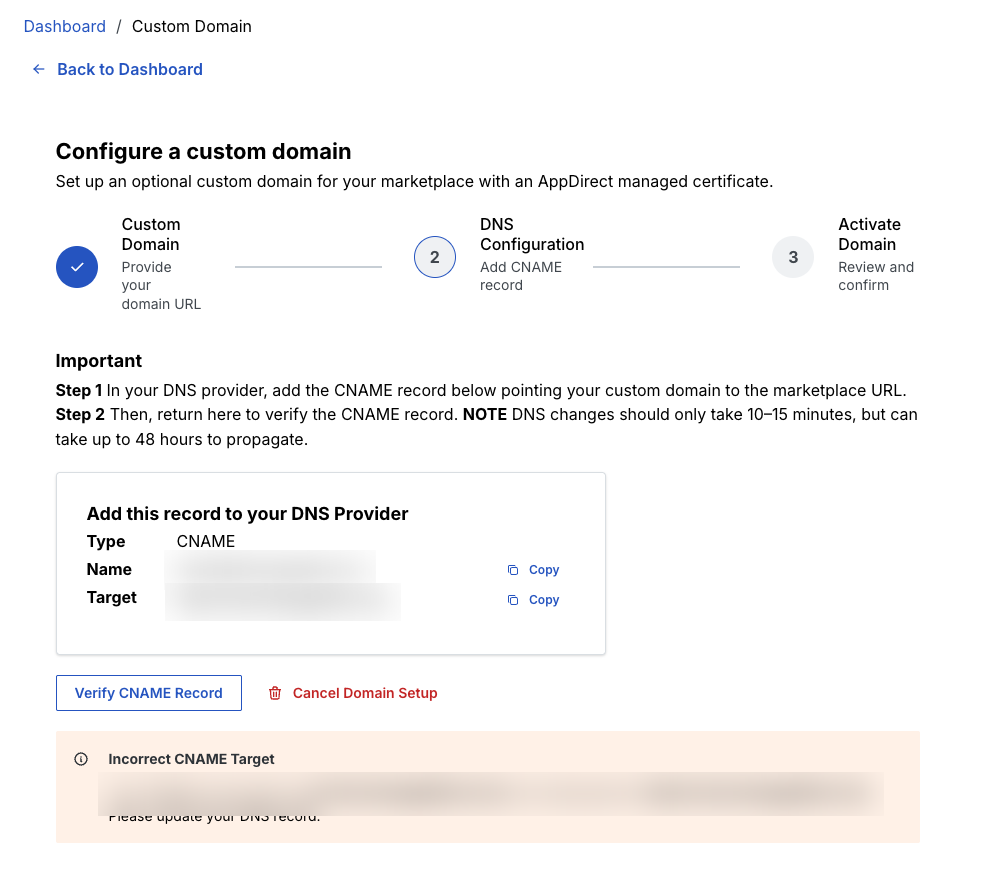
Correct the CNAME record in your DNS provider. Wait for propagation, then click Verify CNAME Record again.
Next steps
After your custom domain is active, set up SSL from the Certificate Management dashboard. Click Manage Certificate on the SSL Certificate card.
Was this page helpful?
Tell us more…
Help us improve our content. Responses are anonymous.
Thanks
We appreciate your feedback!