Cisco security API registration
As Cisco has migrated its API security framework to a new platform, the partners selling Cisco products must complete the security API registration on Cisco (MuleSoft API portal) and update the new credentials on their AppDirect-powered marketplace.
This section provides detailed information on the steps required for API security registration (both on the Cisco portal and AppDirect marketplace).
The process of registration is a one-time activity.
MuleSoft registration
-
Log in to MuleSoft Anypoint.
-
Select the following:
- For PROD - CiscoXaaSAPI and 1.0 API version.
- For POE - CiscoXaasAPI-POE and 1.0 API version.
-
Perform the following:
- For PROD, click Request API Access.
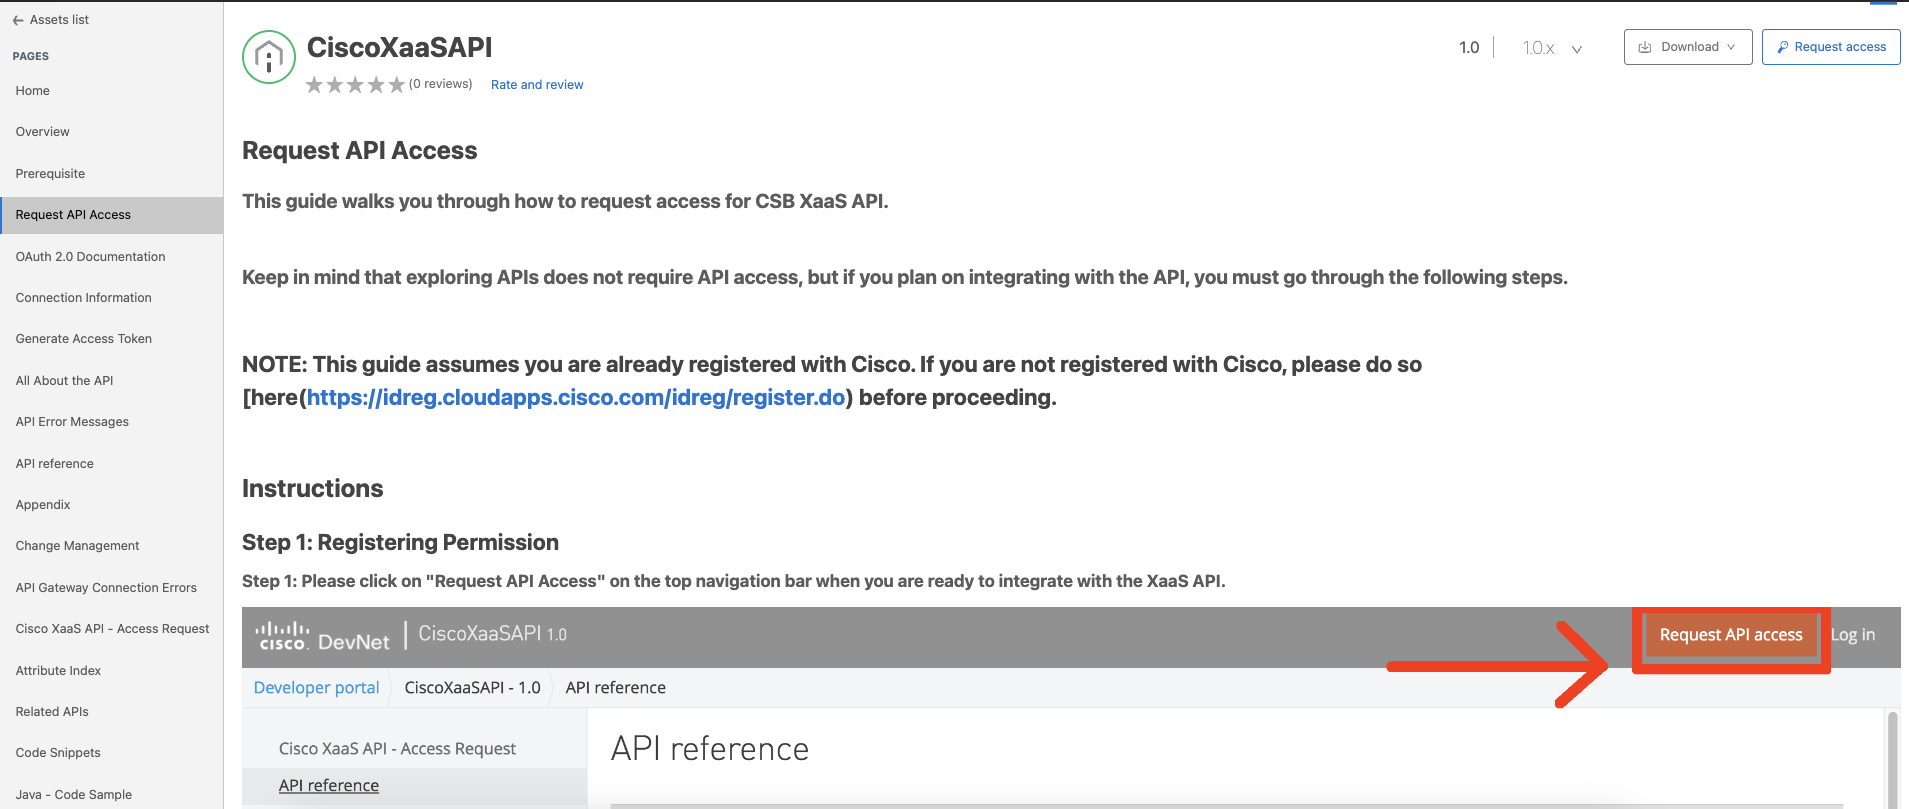
- For POE, click Home and then click Request access on the top-right corner.
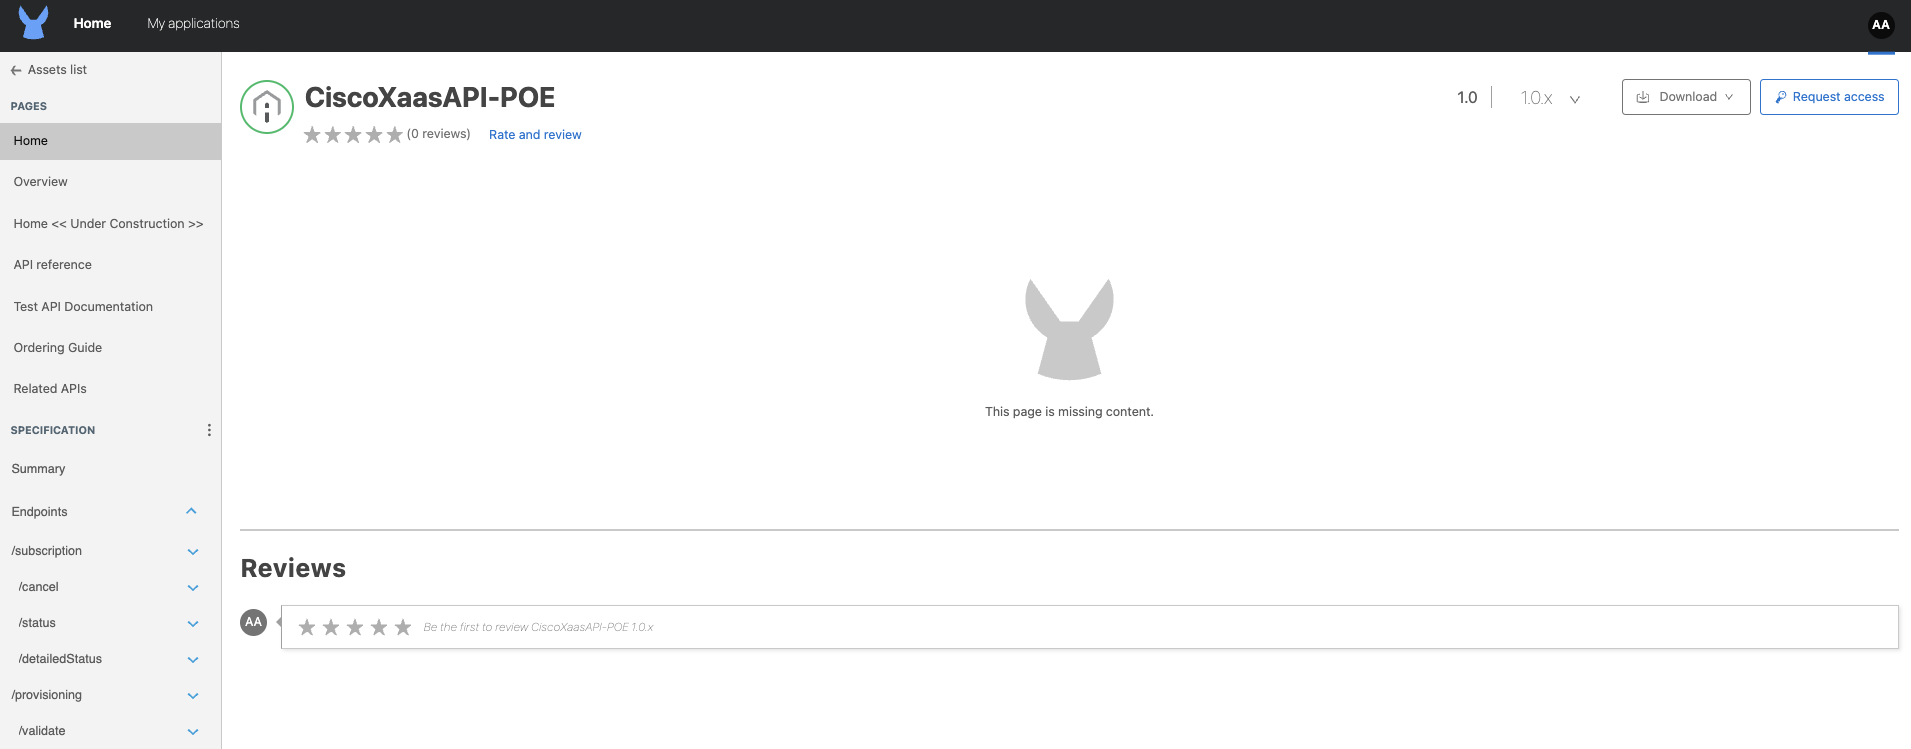
-
Select API instance:
- PROD - CiscoXaaSAPI1.0.
- POE - CiscoXaaSAP-POEI1.0.
-
Click Application and then click Create a new application.
-
Enter or select the details for your application as shown below:
- For PROD environment -
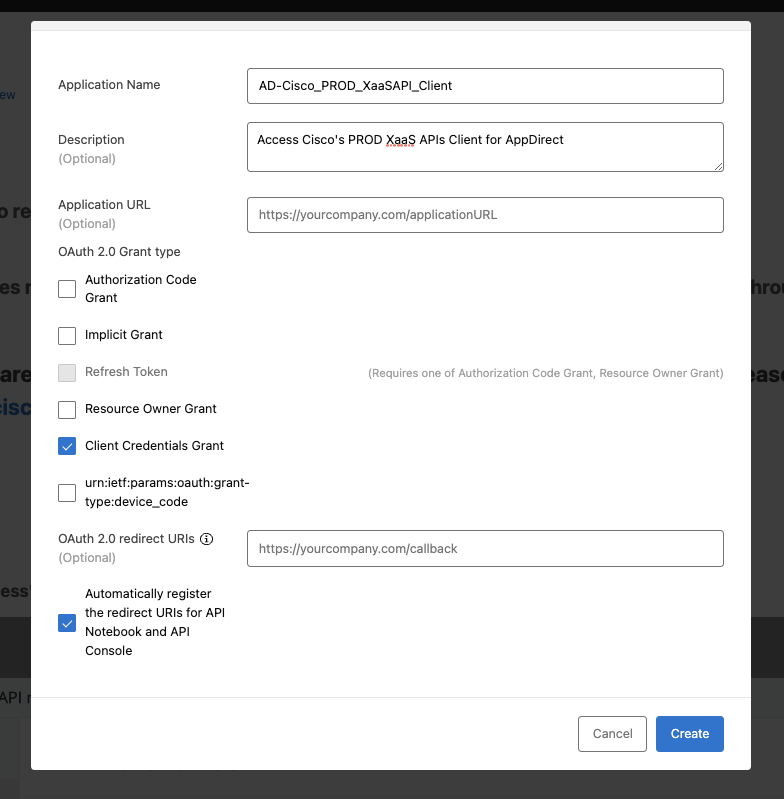
- For POE environment -
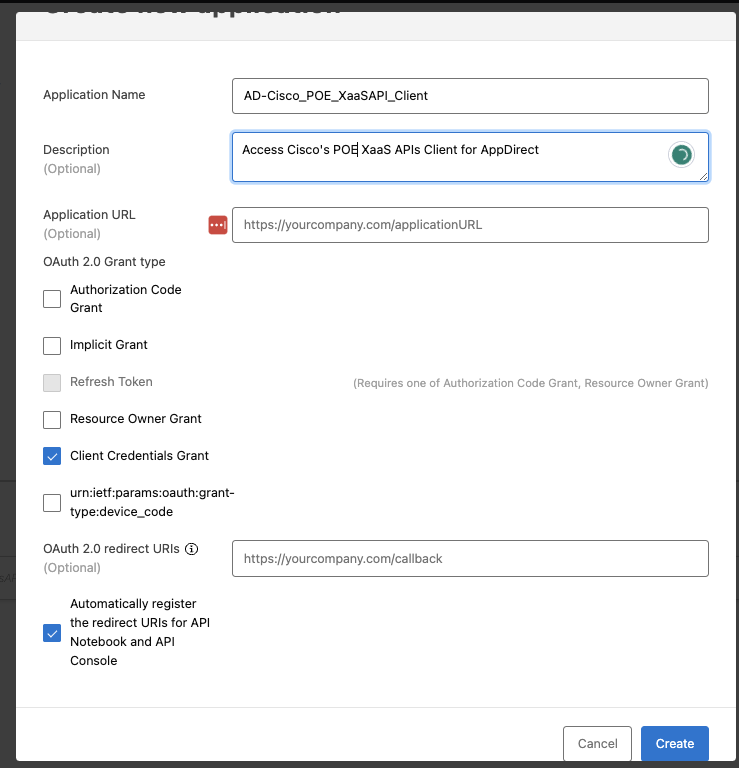
Note: You can replace “AD” and “AppDirect” with your company details.
-
Click Create. The Request access dialog box opens.
-
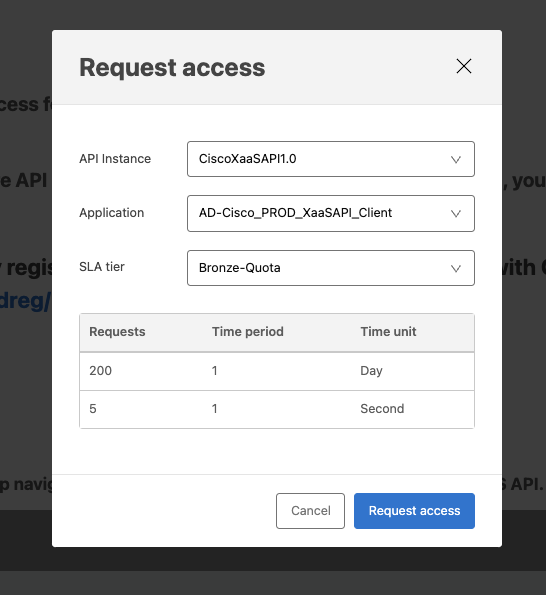
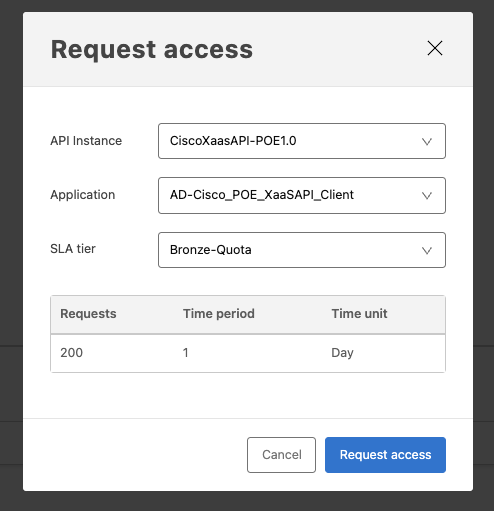
Select SLA tier as Bronze-Quota and then click Request access.
- For PROD environment -
- For POE environment -
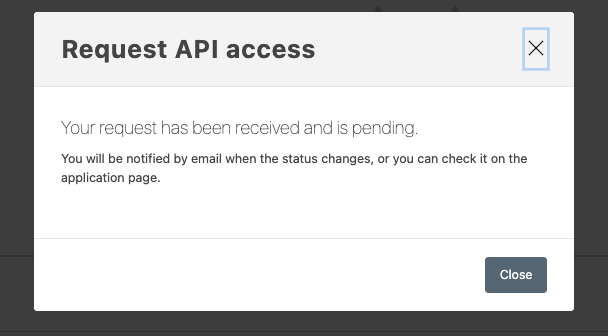
The Request API access dialog box opens.
-
Click Close.
Note: After the above registrations are complete, inform the Cisco team and get the access approved.
-
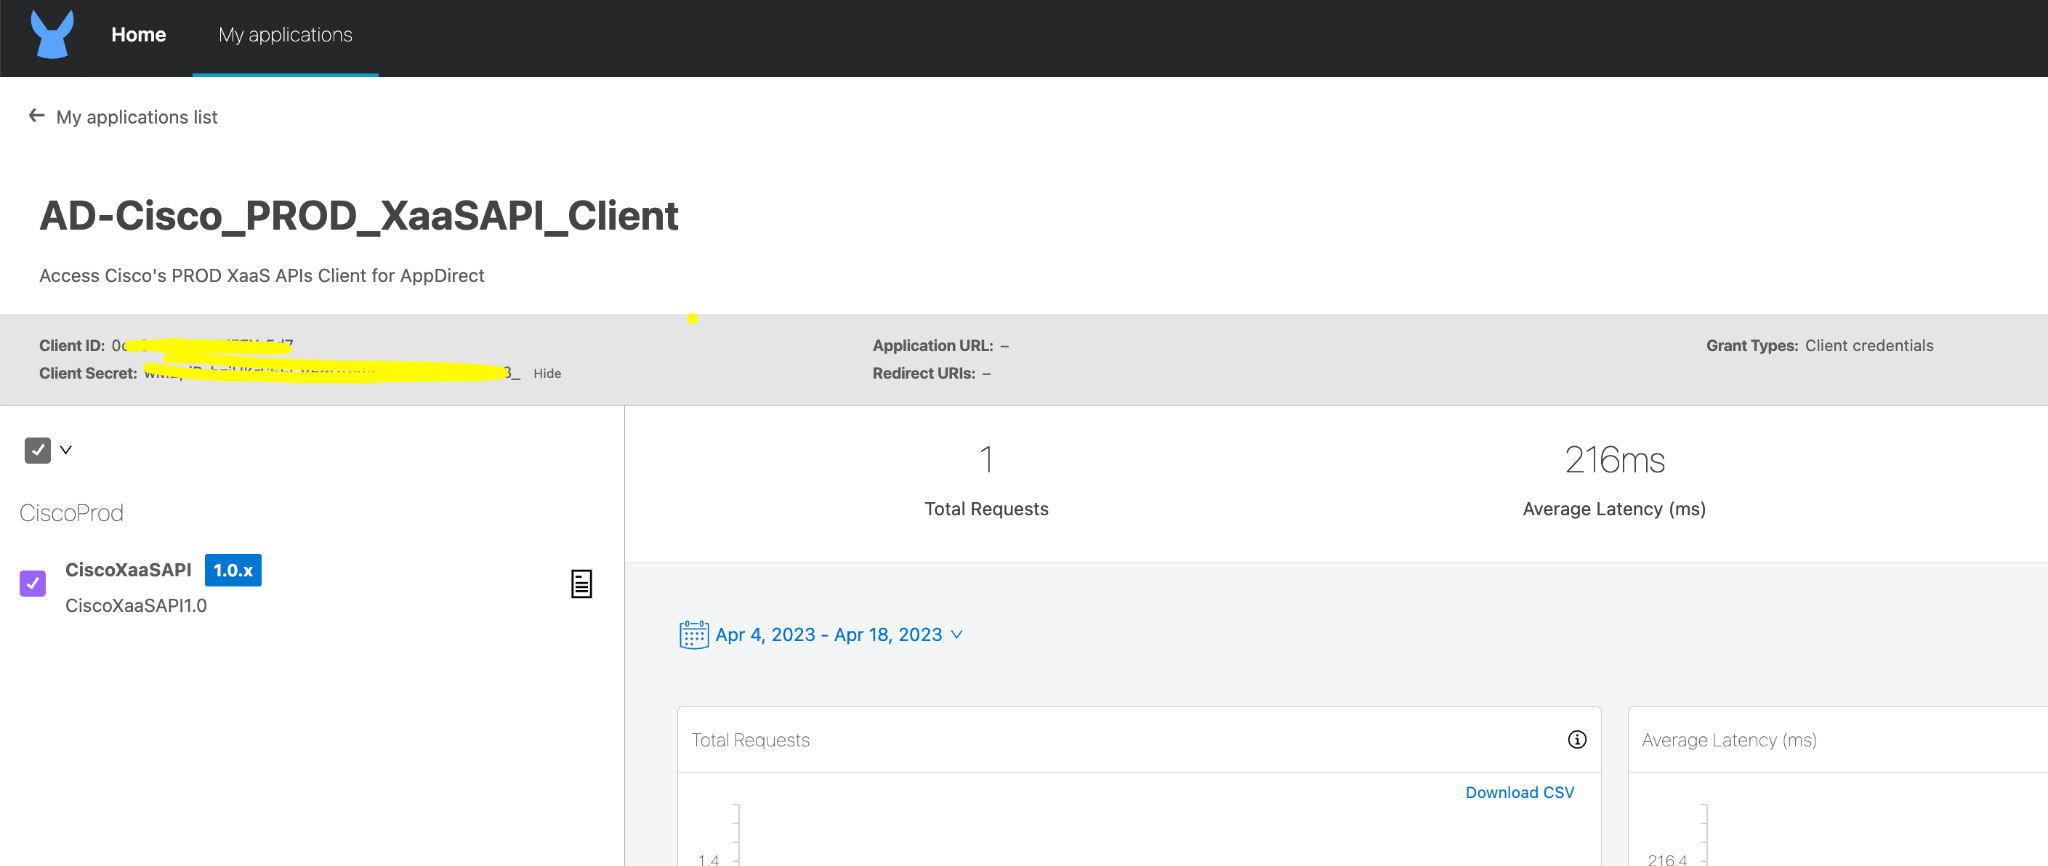
Note down the client ID and client secret details separately for both PROD and POE environments on the My Applications tab.
Update the connector configuration
You can update the connector configuration using any one of the following ways:
- Using the onboarding UI
- Using the Postman application
Using the onboarding UI
Before you proceed, log in to the database and keep backup of the connectors,connector configurations and configurations table.
If the Vendor Integrations option is not available, contact your AppDirect Technical Representative to enable the same.
For details on updating the connector configuration, see Update the connector.
For customer API credentials, contact your AppDirect point of contact.
Using the Postman application
This section provides instructions on updating the connector configuration using the Postman application. Before you proceed, log in to the database and keep backup of the connectors, connector configurations and configurations table.
-
Create an API client.
- Go to Manage > Marketplace > Settings > Integration | API Clients.
The API Clients page opens. - Click Create API Client.
The API Client Settings dialog opens. - Perform the following:
- Select Client Type as Non-interactive application.
- Select Read and write in the System-level scopes drop-down list.
- Click Save Settings. The new API client is created, along with a Consumer Secret and Consumer Key. A message appears that includes the Consumer Secret and a warning that you should copy and store the secret in a safe location because it cannot be retrieved after the message is dismissed.
- Copy the Consumer Secret, then paste it in a file where you can retrieve it later as needed.
- Go to Manage > Marketplace > Settings > Integration | API Clients.
-
Generate the authorization token and update details using the API.
- Import the API collection to the Postman application and then open the connectorConfigurations API.
- Go to the Authorization tab and perform the following:
- Replace {{marketplace-url}} with the marketplace URL
- Enter the consumer_key and consumer_secret generated in step 1
- Click GET NEW ACCESS TOKEN.
- Click USE TOKEN.
- Go to the header and enter the tenant name.
- Go to the body and perform the following:
- Replace {{marketplace-url}} with the marketplace URL
- Enter the tenant and connectorId of the active connector you want to update
- Enter the BID from backup of connector_configuation table entry
- Enter all the other values that you want from old configs except credentials
- Enter the credentials generated above in the MuleSoft registration
MuleSoft = PMI/XaaS API
For customer API credentials, contact your AppDirect point of contact.
- Click Send.
- Verify in the database if all the entries are correctly updated.
Verification
Run any test order and verify if the order is successfully passed.
Was this page helpful?
Tell us more…
Help us improve our content. Responses are anonymous.
Thanks
We appreciate your feedback!