Customize login page
Marketplace Managers can use the Storefront Builder to customize the login experience. You can customize login page elements such as:
- Background colour
- Background images
- Button colors
- Layout
- Text inputs
The color theme customized for the login panel will also reflect on the following pages:
- Forgot password
- Reset password
- Change password
- Sign-up
- Two-factor authentication
To customize the login page
📝 Note: This documentation page may refer to Manage > Marketplace in navigation steps. If the Manage option is not available in your navigation, click the grid icon on the top-left corner of your header and click Marketplace.
-
Go to Manage > Marketplace > Theme Manager.
-
In the Live Theme section, click Customize.
-
Expand the Home Page option, and select Login.
The current login page is displayed on the right and customization options are available in the left panel. -
The following customization options are available:
LAYOUT SETTINGS
You can configure the login page layout to display the login page as a single panel or as a dual panel.- Single panel - Select this option to render a single page login screen.
- Dual panel left - Select this option to have the login panel on the left and the content panel on the right.
- Dual panel right - Select this option to have the login panel on the right and the content panel on the left.
📝 Note: You can customize both the login panel and the content panel individually.
LOGO SETTINGS
You can use the logo settings to configure the placement and size of the logo. You can also set the logo link to either lead to the home page or a custom URL.- No logo - Select this option if you do not want to add any logo to the login panel.
- Light logo - Select this option to render the logo in light mode.
- Dark logo - Select this option to render the logo in dark mode.
- Logo height - Adjust the bar or the pixel count to adjust the height of the logo.
- Logo alignment - Click the drop down to select the logo placement on the login panel. You can choose from Left, Center, and Right options.
- You can also select where the logo link will lead the user to. You can select from:
- Logo links to home page - This is the default setting and clicking the logo on the login screen will lead the user to the home page.
- Logo links to custom URL - This option allows you to link the logo to a custom page. Select this option, and provide the required link in the Link field that appears.
LOGIN CARD
You can configure the required color for each element of the login card directly from the color pallet or provide the Hex code or RGBA value. You can also set the transparency of the elements.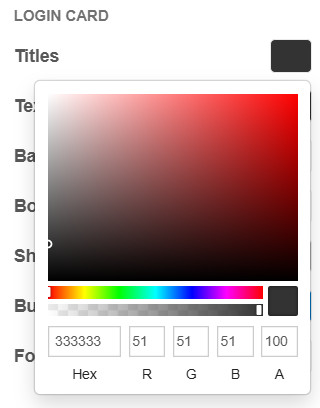
- Titles - Click the corresponding color selector to set the color for the Title of the login card.
- Text - Click the corresponding color selector to set the color for all the text elements on the login card.
- Background - Click the corresponding color selector to set the background color of the login card.
- Border - Click the corresponding color selector to set a border for the login card.
- Shadow - Click the corresponding color selector to set the shadow for the login card.
- Button - Click the corresponding color selector to set the color for the button on the login card.
- Footer - Click the corresponding color selector to set the background color for the footer on the login card.
- Card corner radius - Click the corresponding color selector to set the corner radius for the card. Adjust the bar or the pixel count to adjust the card corners.
- Display shadow - Check this checkbox to add a shadow to the login card.
- Display footer links - Check this checkbox to display the footer links like the Help, Privacy and so on, on the login card.
- Display custom text - Check this checkbox to add custom text on the login card.
- On checking this checkbox, the Custom message field appears provide the required message in this box.
- You can also add a link if required. To add a link use square brackets [] to add the link message and provide the link in the Message link field.
- To allow the link to open in a new browser tab, check the checkbox Open link in new browser tab.
LOGIN PANEL
You can customize the background color or display a background image on the login panel/page.- Upload image - Click Browser, a file explorer opens. Browse and select the image you want to use.
📝 Note: The image must be in JPG or PNG format and the maximum size of the image can be 2MB. - Image alt text - Provide alternate text describing the image for better accessibility.
- Login panel background - If you do not want to use an image you can set a required background color by clicking the color selector and selecting a color from the color pallet or provide the Hex code or RGBA value. You can also set the transparency.
CONTENT PANEL
You can add a content panel using the layout option to display an image, or an iFrame (inline frame). You can also customize the background color.- Content source - Set the source from where the content is displayed on the content panel. The options are:
- Upload image - To upload an image for the content panel, select this option and go to Upload image option and do the following:
- Click Browser, a file explorer opens. Browse and select the image you want to use.
📝 Note: The image must be in JPG or PNG format and the maximum size of the image can be 2MB. The recommended size for the image is - 720px by 1080px. - Provide a description for the image in the Image alt text field for accessibility.
- If required provide an image link in the Image link field.
- Customize the content panel background color by clicking the color selector and selecting a color from the color pallet or provide the Hex code or RGBA value. You can also set the transparency.
- Click Browser, a file explorer opens. Browse and select the image you want to use.
- Link to IFrame - In place of an image you can provide a link to the marketing content or a customised web page. Select this option and provide the URL in the Link field.
- Upload image - To upload an image for the content panel, select this option and go to Upload image option and do the following:
-
Click Publish. The changes are applied to the login page.
Was this page helpful?
Tell us more…
Help us improve our content. Responses are anonymous.
Thanks
We appreciate your feedback!